
INSTALLATION INSTRUCTIONS
What is in the installation pack?
- Your installation plan (one per carpet bed), and an InstaPlant leaflet which shows pictorial steps that will assist you with the installation of your InstaPlant® carpet bed.
- There is a 3 letter code in the bottom-right corner of each plan; this is your display code. This code is marked in yellow/white on the left-hand side of the top edge of each tile in your delivery.
- On your plan the large rectangles refer to your individual tiles of plants. The grid references on the plan correspond to the yellow location marking in the centre of the topside of each tile.
On receipt of your InstaPlant carpet bed delivery
1. InstaPlant trays need to be removed from the trolleys as soon as the delivery arrives. The driver will show you the first trolley of your carpet bed, the trays are loaded in sequence starting at the base of the trolley i.e. your first top left tray on your plan is the first tray on the bottom shelf of the trolley.
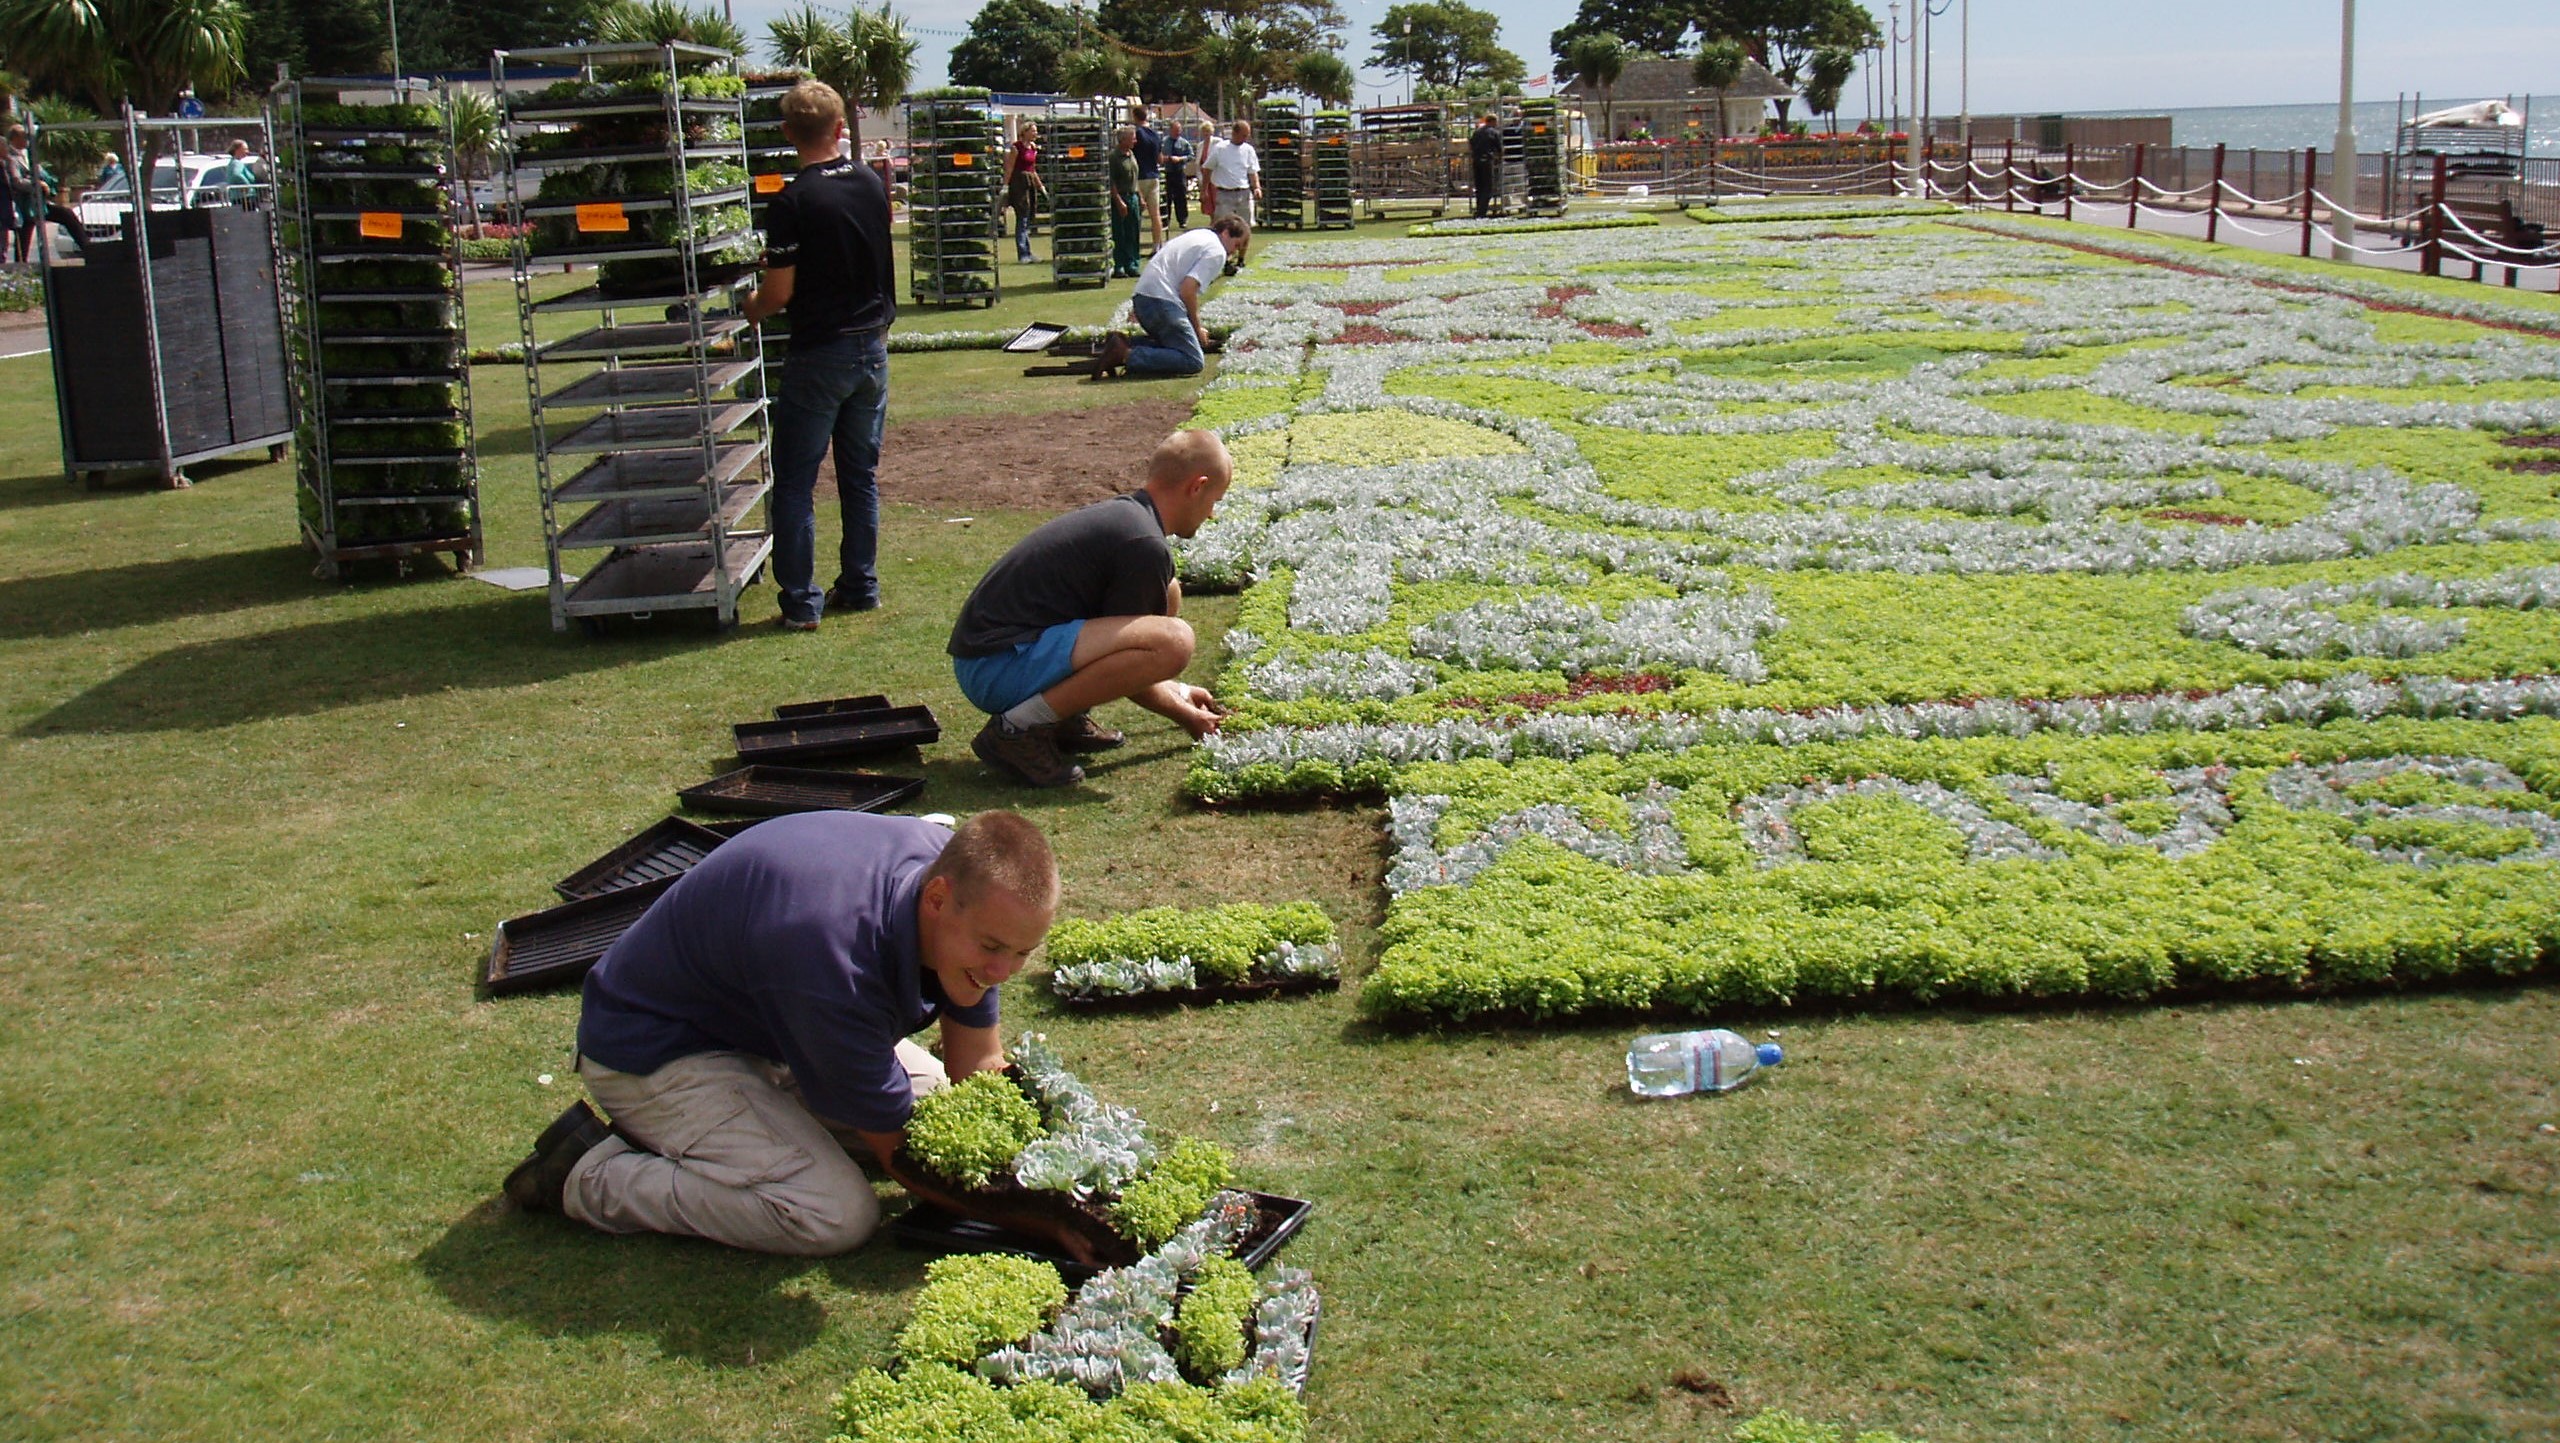
2. It is essential that you follow the plan enclosed to firstly assemble the carpet bed in its plastic trays. Ensure you have enough room to lay out the whole display and that all the tiles match your plan before installation. If you are intending to install the carpet bed now then temporarily place the tiles in order next to the intended installation bed.
3. The yellow location number should always be towards the top of the display.
4. The compost of each tile should be on the dry side to ease installation, but if the compost is very dry then the plants should be given a little water. Take care not to over-water because this could make the plants difficult to remove from the trays during installation.
NOTE: If not are not intending to install the InstaPlant® carpet bed on arrival then lay the tiles in sequence in a light and safe location. Give the plants a good water and look after the display prior to transferring to site and laying them down in sequence next to the bed.
You are now ready to commence installation as follows:
Items needed to install your InstaPlant carpet bed:
- 1 rake
- 1 roll of String
- 4 stakes
- 1 Measuring tape
- 1 sharp knife
Setting up your centre-line: Refer to the plan to see the thick black lines that are your recommended centre-lines. Measure the distances shown on the plan and mark the points using the stakes. Use string to mark your centre-lines and ensure the lines are taught. The centre-lines can now be used when installing your InstaPlant® trays to ensure that your display is centred.
Installation Method: First you should install the central column of tiles. Start at the top and install the 2 top trays on either side of the vertical string line. Refer to your plan for the number of the tray to lay first. Do the same with the next row and all rows down to the bottom of the bed. Then install the remaining top row and then you should have a ‘T’ shape of tiles that you can use as a guide for the remaining tiles. Ensure that you are happy with the ‘T’ shape before laying the remaining tiles. Lay the remainder of the tiles starting from the centre out one row at a time from top to bottom. Ensure the remaining tiles are going to fit the remaining area. Always check your plan for guidance (click here to download Installation Instructions).
Sliding out the Tiles: Always position the tray where you want to install it so that the yellow location marking faces towards the top of the bed. Kneel (or squat) just below the tray position and get hold of the fleece with one hand and gently pull the plastic tray out from under the tile with your other hand. Once on the bed tuck in the fleece under the tile and ensure the tile of plants butt up closely to the next tile by gently pushing with your hands. Before installing the next tile- give the area you were kneeling on a quick rake to ensure the surface is level
Circular or Irregular shaped designs:
1. Some designs due to irregular shape or dimensions may not cover some trays fully; this will be at the edge of the display.
2. If the plants cover less than half a normal size tray then a ‘half-tray’ is used. These are represented by an ‘H’ on the plan. ‘Halftrays’ can be found at the end of the delivery for the each display.
3. Tiles that are not covered in plants are laid as normal. Half-trays do not have the fleece base so the tile will need to be carefully slid out of the tray.
4. When in position the surplus compost will then need to be cut away using a sharp knife and removed.
If you have difficulty removing the InstaPlant tiles from the trays:
1. If the compost has been over watered the plants can be difficult to slide out of the trays. If possible allow the compost to dry out slightly before proceeding.
2. Give the tray a gentle shake to loosen any roots from the tray.
3. If you still experience difficulties, use a sharp knife to slice the tile in half and slide out in turn.
Leaving InstaPlant in its trays
1. The tiles may be left in its trays as a temporary or mobile display (for exhibitions, special events etc.)
2. Extra care must be taken with watering in order to prevent InstaPlant® drying out.
Maintenance of the InstaPlant Carpet Bed
Maintaining the InstaPlant® carpet bed should be fairly easy, it is like maintaining normal bedding except plants like Alternanthera require more water than succulent plants like Sedums and Echeveria which retain water and prefer dry conditions (as do most grey plants). On hot days you may need to water the display twice; on rainy days not at all, you need to check the
compost base of the tile once a day and ensure the compost base is moist.
If its getting dry then will need some overhead watering. Also three times a season it will need a trim (using trimming shears), can do this more often but 3 times a season should be ok depending on how neat and tidy you want to keep the display. Basically, treat it like a live work of art and try to keep it looking like a mature version of the carpet bed we deliver to you.
IMPORTANT SAFETY NOTICE:
The ‘Danish-trolleys’ are not designed to be lifted off the tailgate using a forklift. The trolleys can weigh at least 500kg and it is easy to tip them over or for the trolley to topple off the forks. The off-loading of the trolleys is the responsibility of the driver to the point where they rest on the ground. From that point they are the responsibility of the consignee. We always appreciate help when unloading but please remember we have instructed our drivers that they have the responsibility for unloading to the ground and have the authority to refuse unsafe unloading; this includes excessive slopes at the point of unloading. Trolleys, once on the ground, can be forklifted with care but please remember they are not specifically designed for this purpose and Kernock Park Plants does not take responsibility for the plants or any third party damage when doing so.
We hope you will pass on this information to the relevant staff and contractors and thank you for your co-operation.
We hope you enjoy your InstaPlant carpet bed, please do not hesitate to contact us if you have any questions or if you require a quote for another InstaPlant carpet bed.
Payments Secured by Sage Pay![]()
The highest level of card data security. PCI DSS Level 1 compliant.
PayPal Accepted![]()
Most preferred way to pay online in the UK. Pay online without entering sensitive information.
![]() Security Metrics Tested
Security Metrics Tested
Quarterly tested to ensure high security standards.
© 2018 Kernock Park Plants Ltd. All rights reserved.
This web site is owned and operated by Kernock Park Plants Ltd. Company registration No. 03297350.
If you have any suggestions or comments or if you need to contact us, please email us on sales@kernock.co.uk.
VAT Registration Number 326 7561 45, Pillaton, Saltash, Cornwall, PL12 6RY, EU Plant/Quality Passport UK/EW 20268.
Prices exclude VAT (Charged at 20%) unless otherwise stated. Terms & Conds | Privacy Policy | Site Map |
Follow Us: